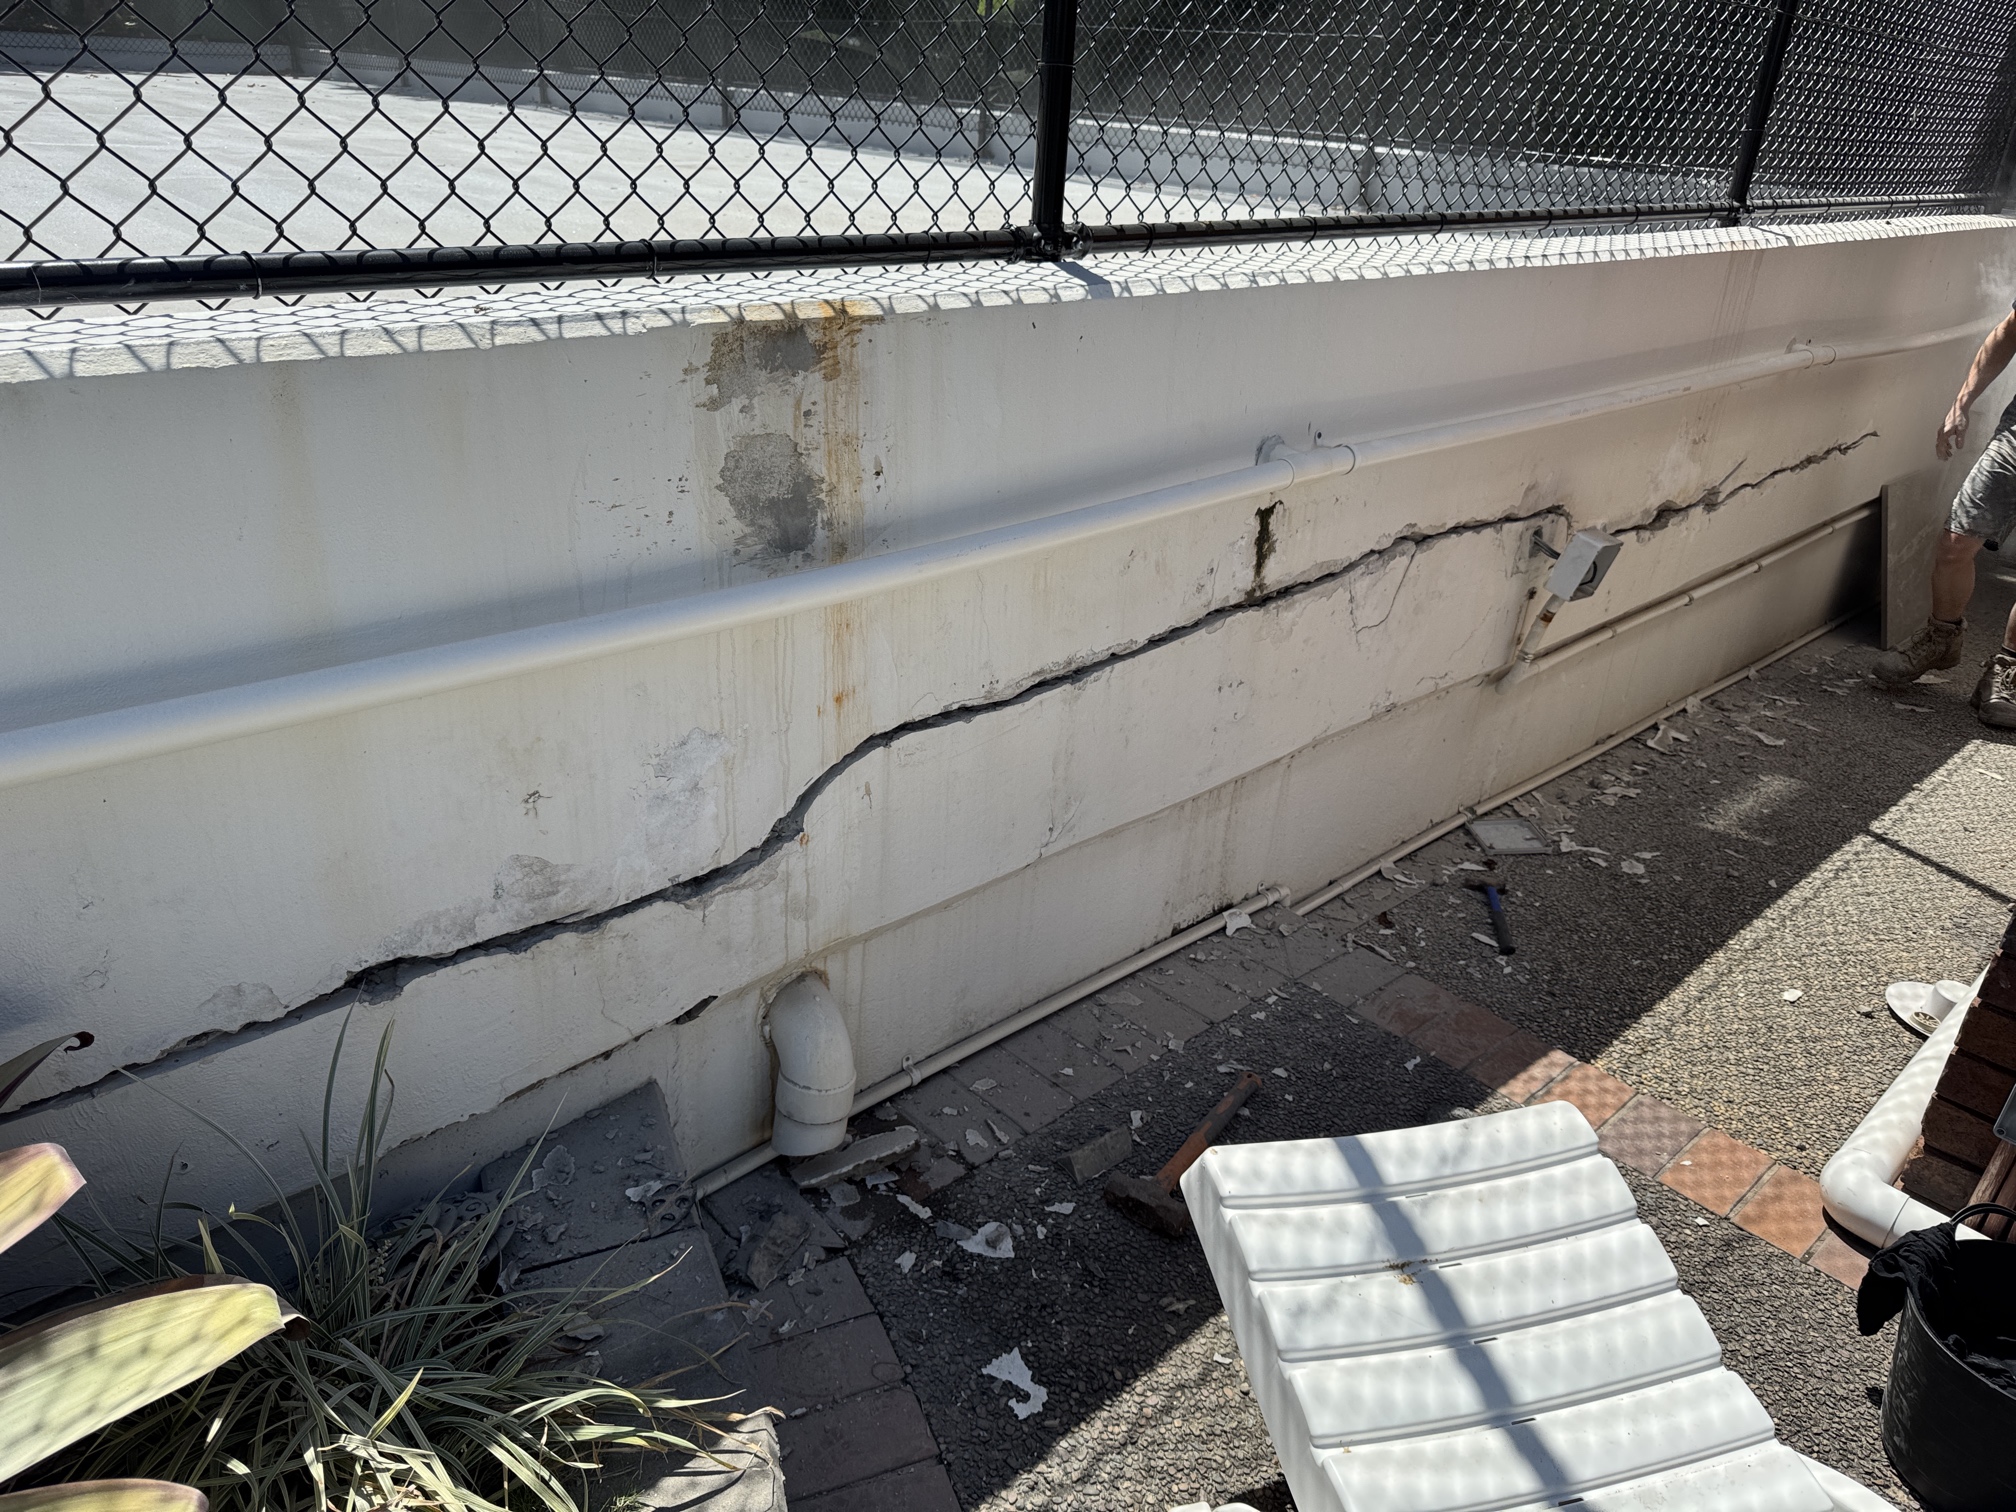
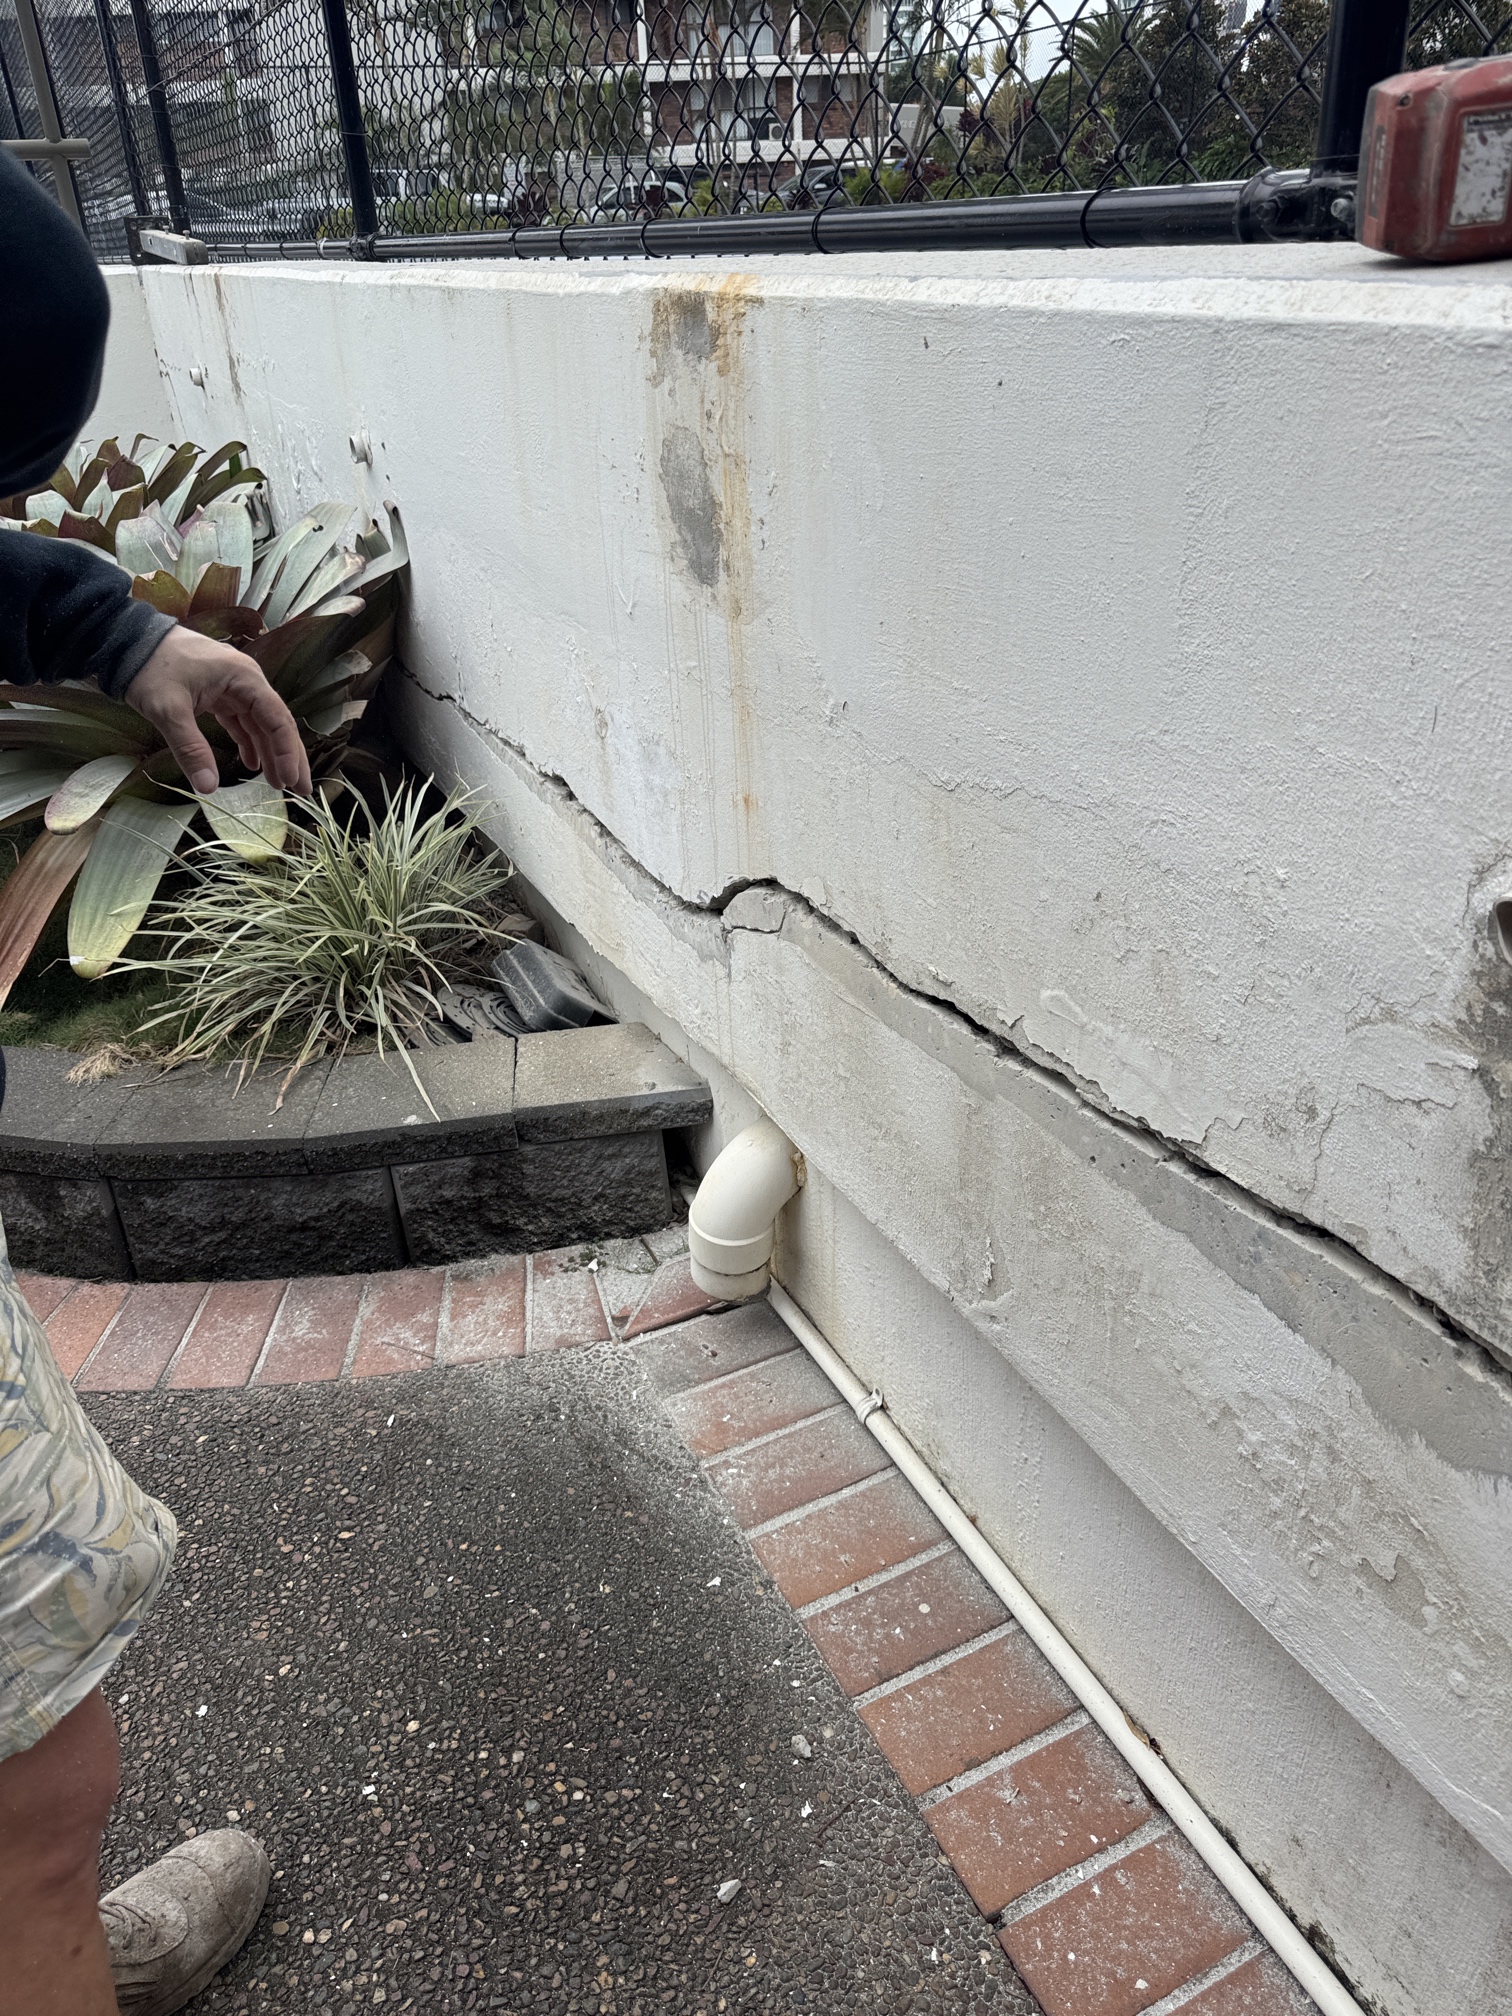
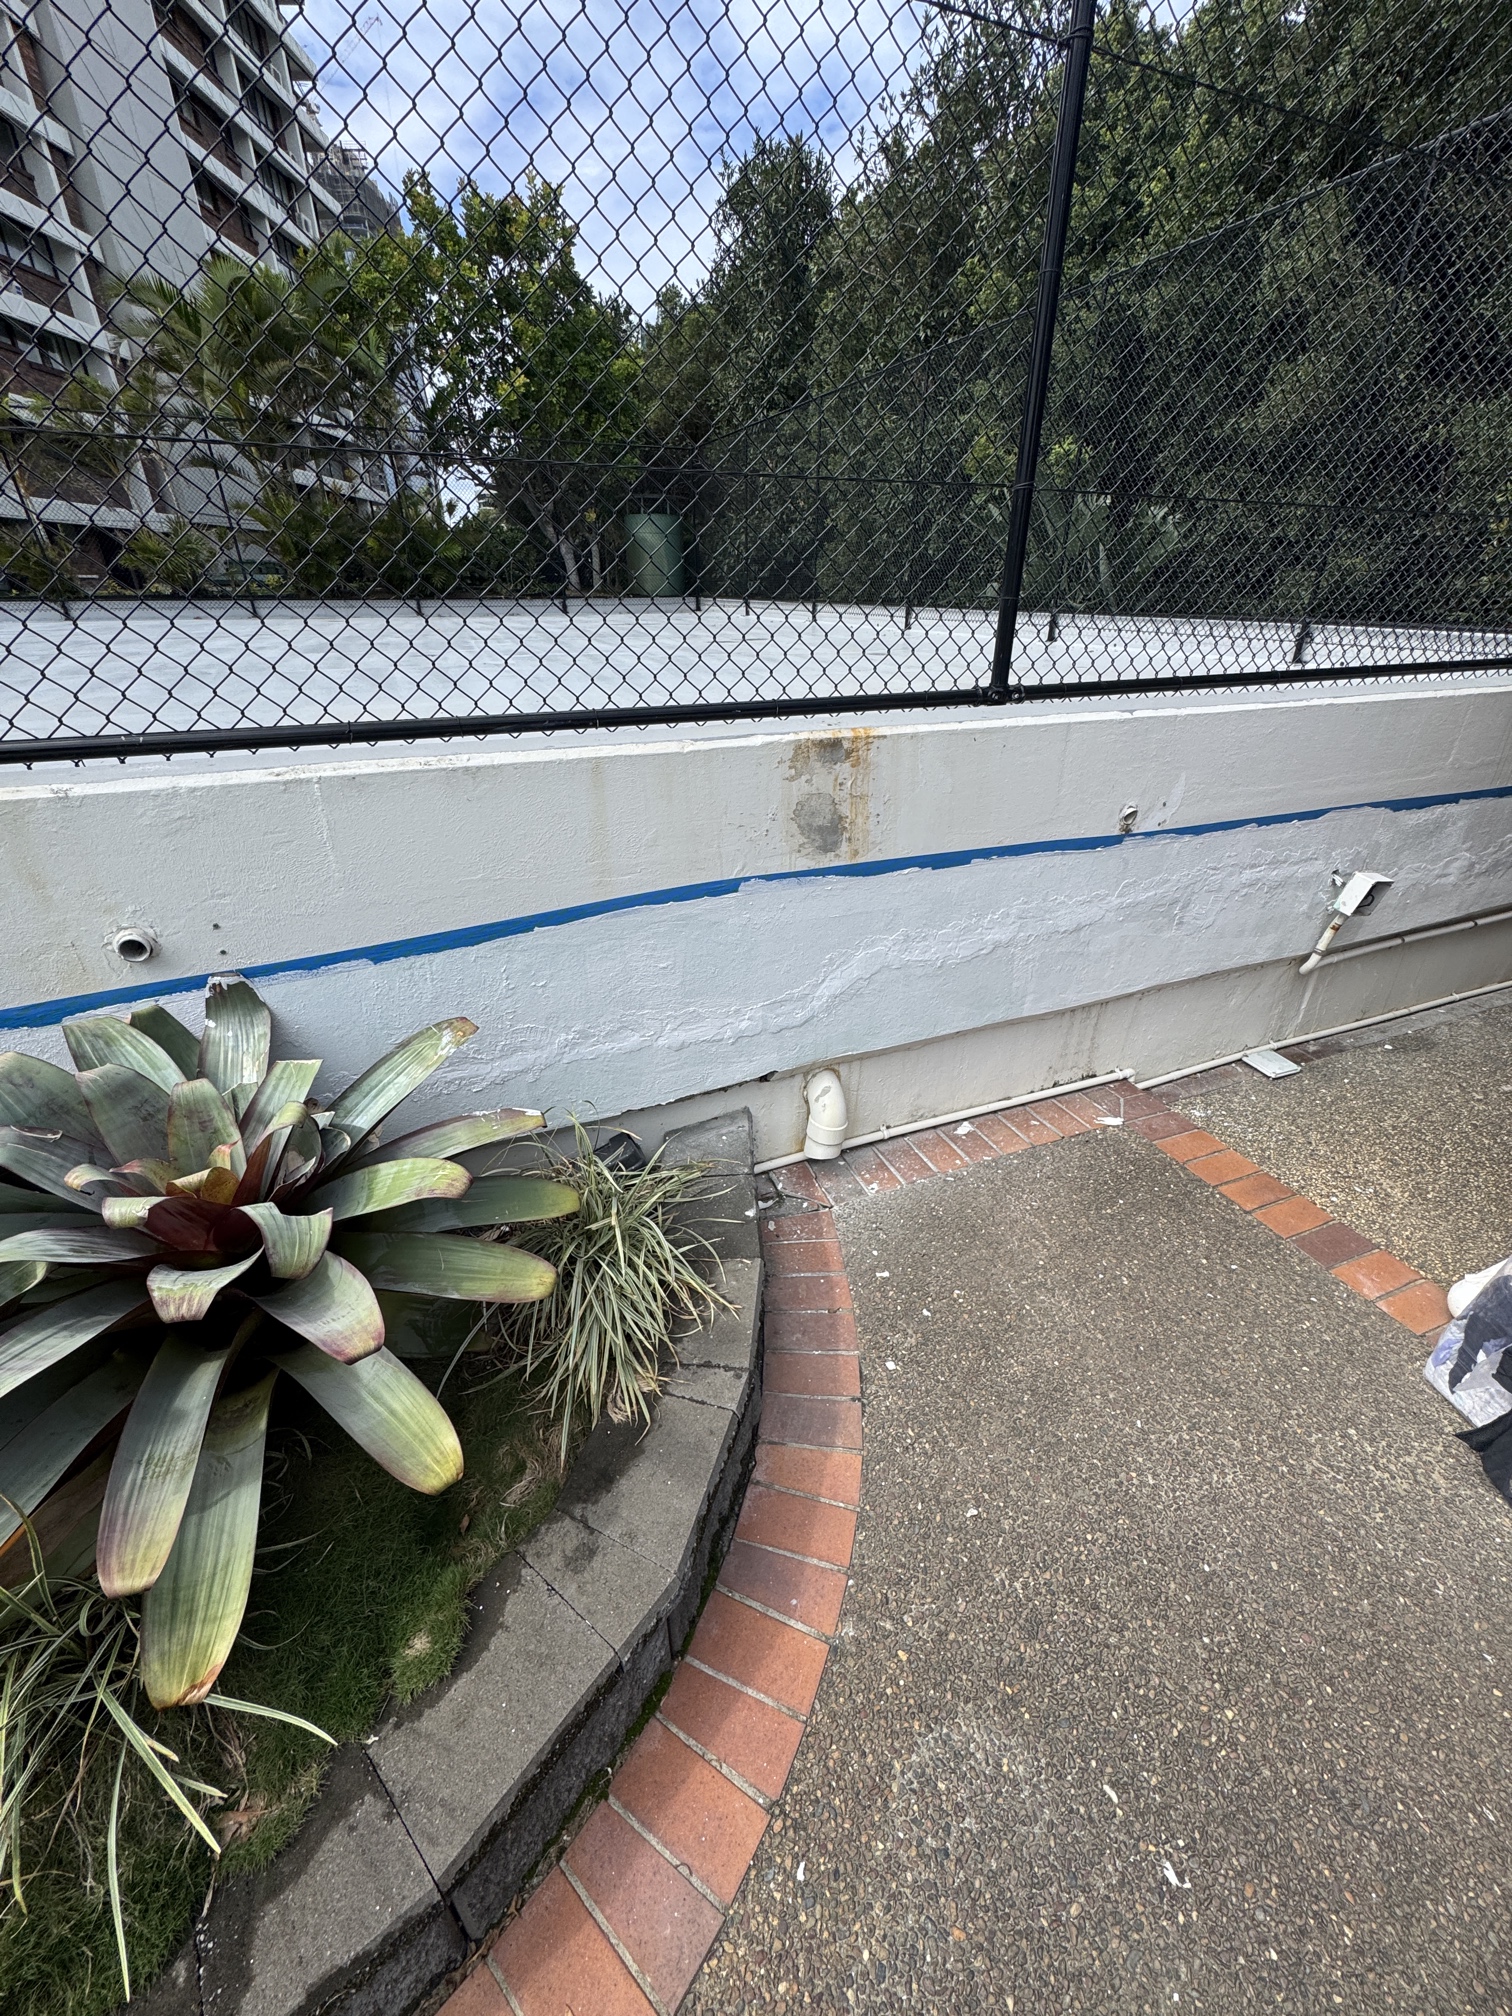
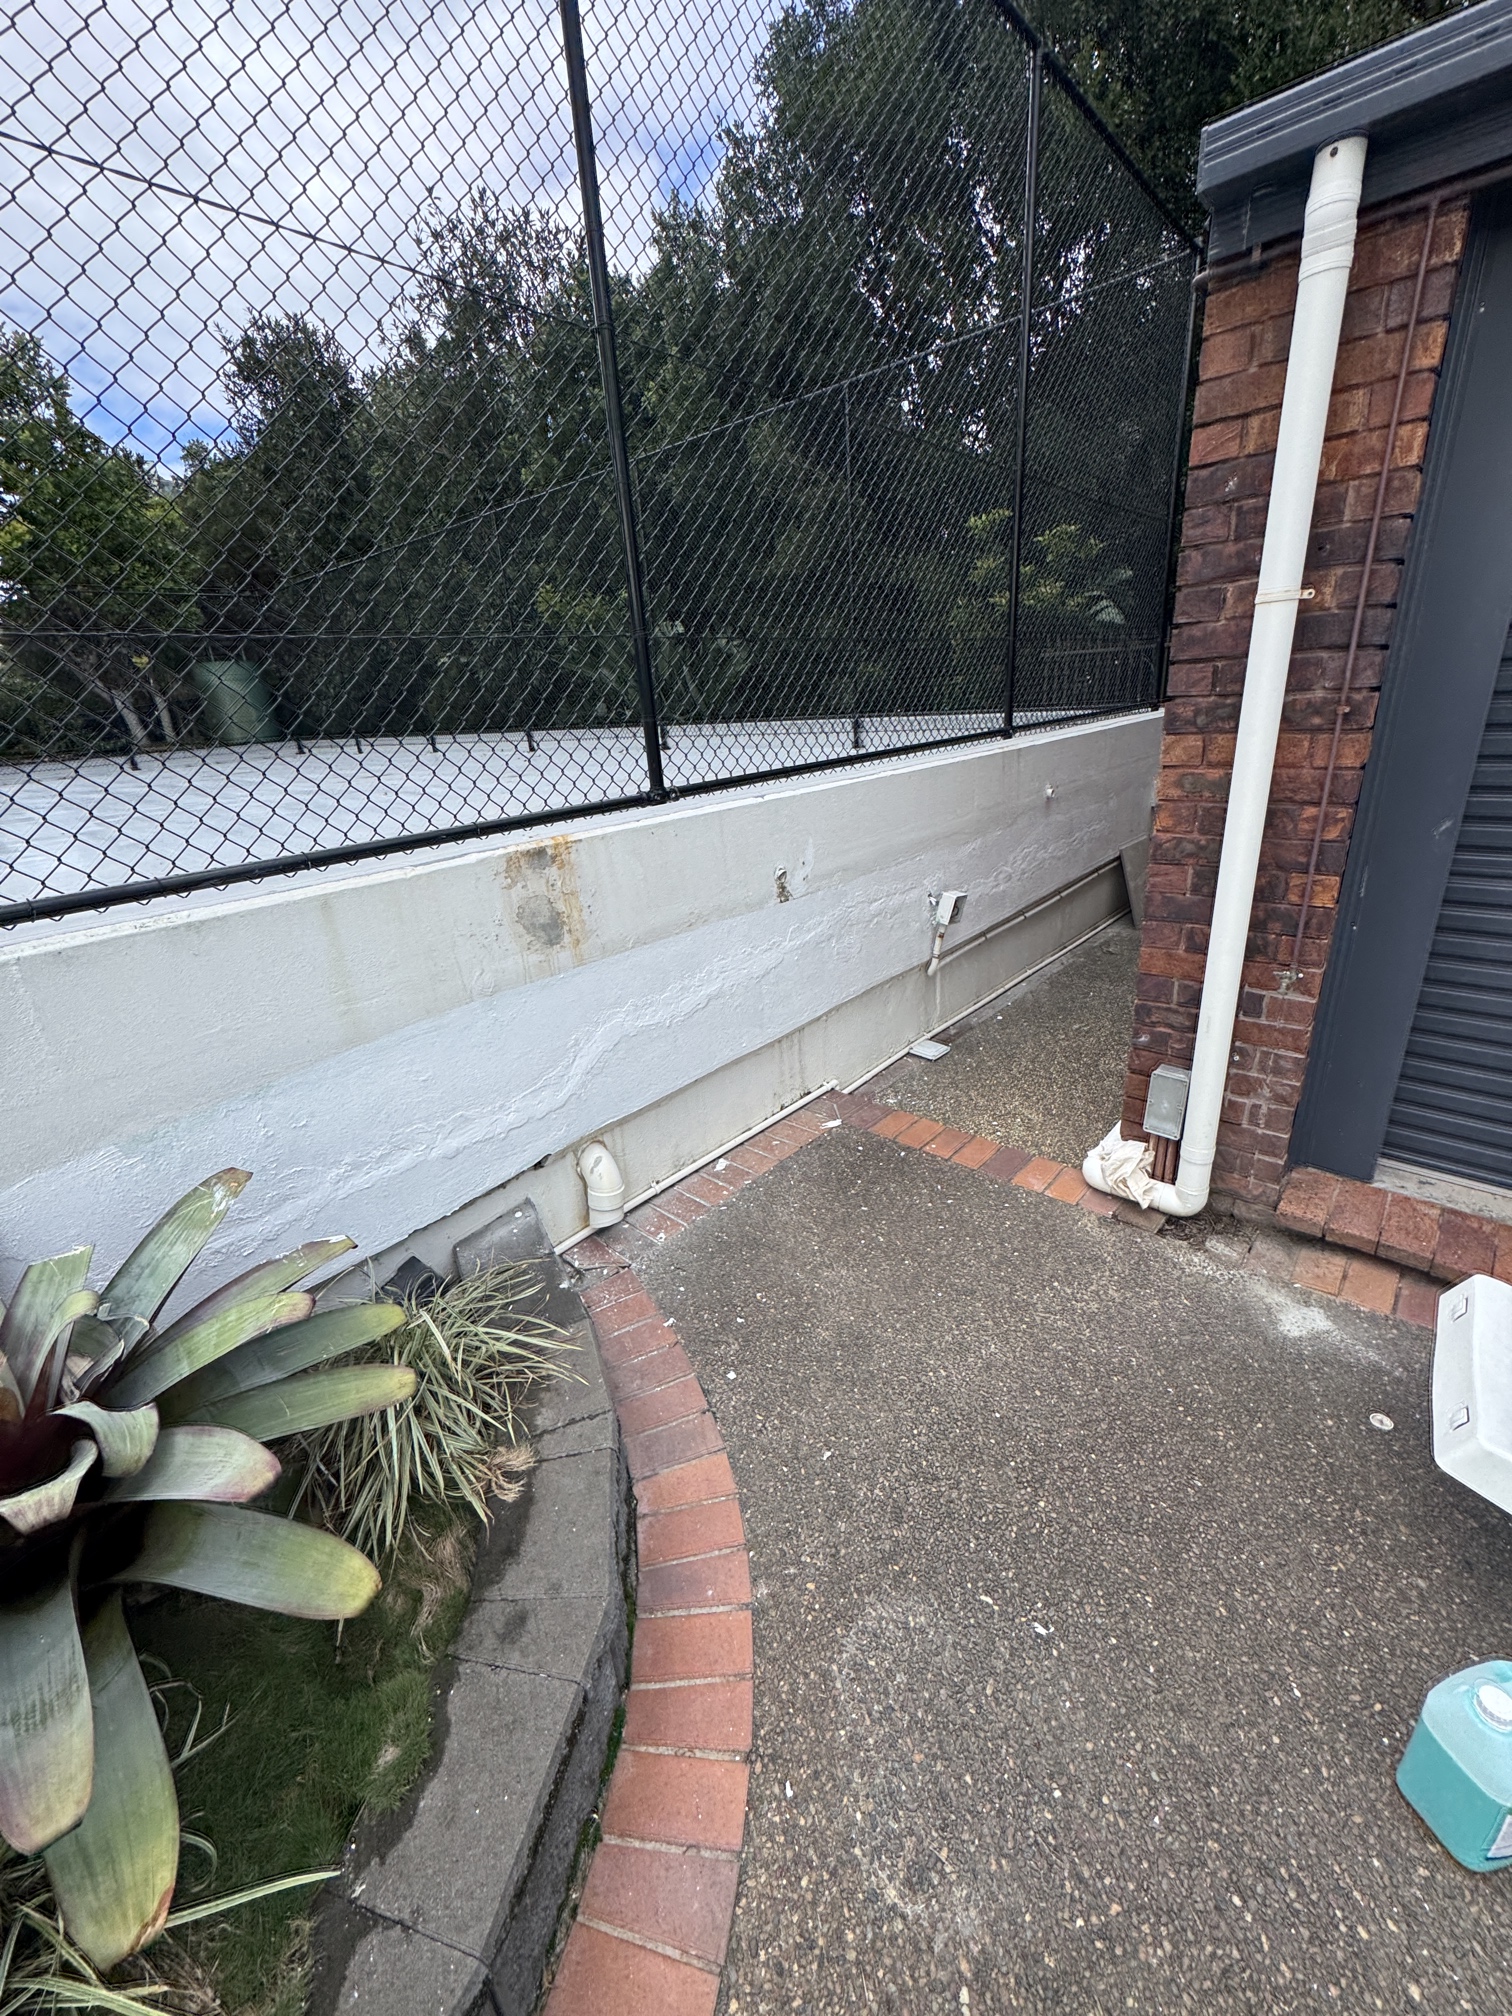
We carried out remediation works on a cracked external wall running alongside a carpark and tennis court. The wall had developed a major crack spanning roughly 15 lineal metres, with visible signs of concrete cancer requiring urgent repair to prevent further structural damage.
Initial Findings
Our inspection confirmed extensive cracking and early-stage concrete cancer. We also found that existing plumbing brackets were failing, causing the pipework to bend and lose fall—creating conditions for ongoing water ingress and added pressure on the wall.
See below for a visual breakdown of the steps we took to restore the wall and ensure long-term protection:
Step 1: Inspect of the area
Before any work began, we conducted a thorough inspection to assess the extent of the cracking and identify early signs of concrete cancer. This step was crucial in determining the appropriate scope of remedial works.
Step 2: Close Inspection of Wall Crack
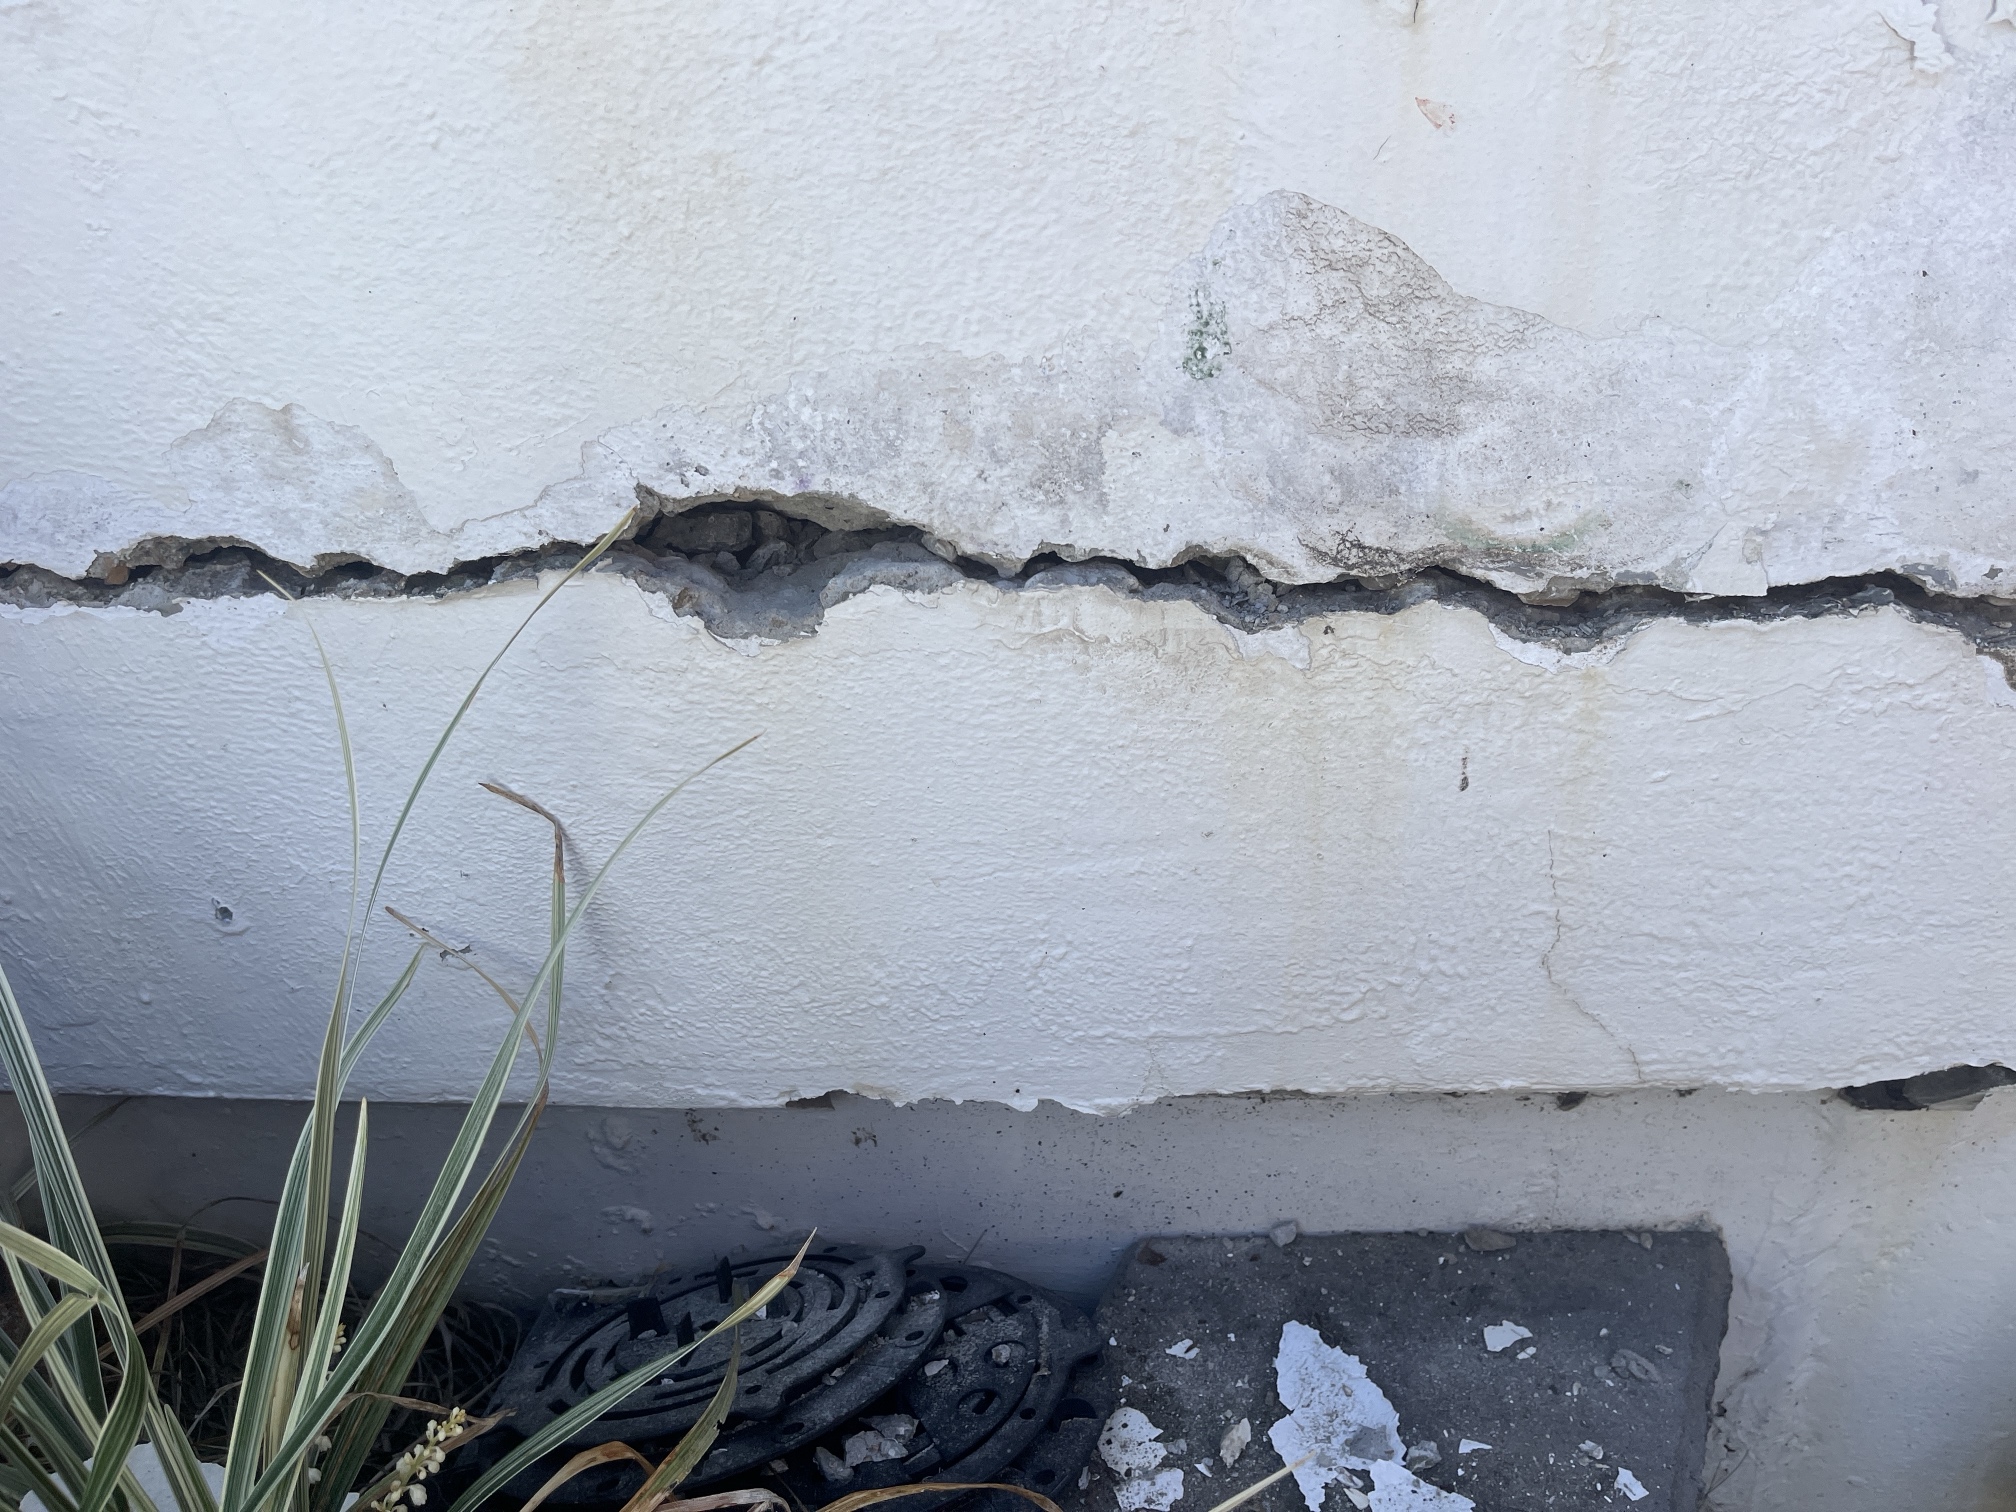
A detailed inspection of the crack revealed extensive damage running approximately 15 lineal metres along the wall. Visible signs of concrete cancer were present, including spalling concrete and rust staining—indications that moisture had reached the steel reinforcement beneath the surface.
Step 3: Preparation Works
Pipework Removal: We began by removing the existing pipework and storing it securely for reinstallation.
Demolition of Failed Concrete: All loose and deteriorated concrete was removed to expose the full extent of the damage, including any corroded steel reinforcement.
Surface Preparation: The wall surface was ground back to create a stepped profile and a smooth finish ready for sealing.
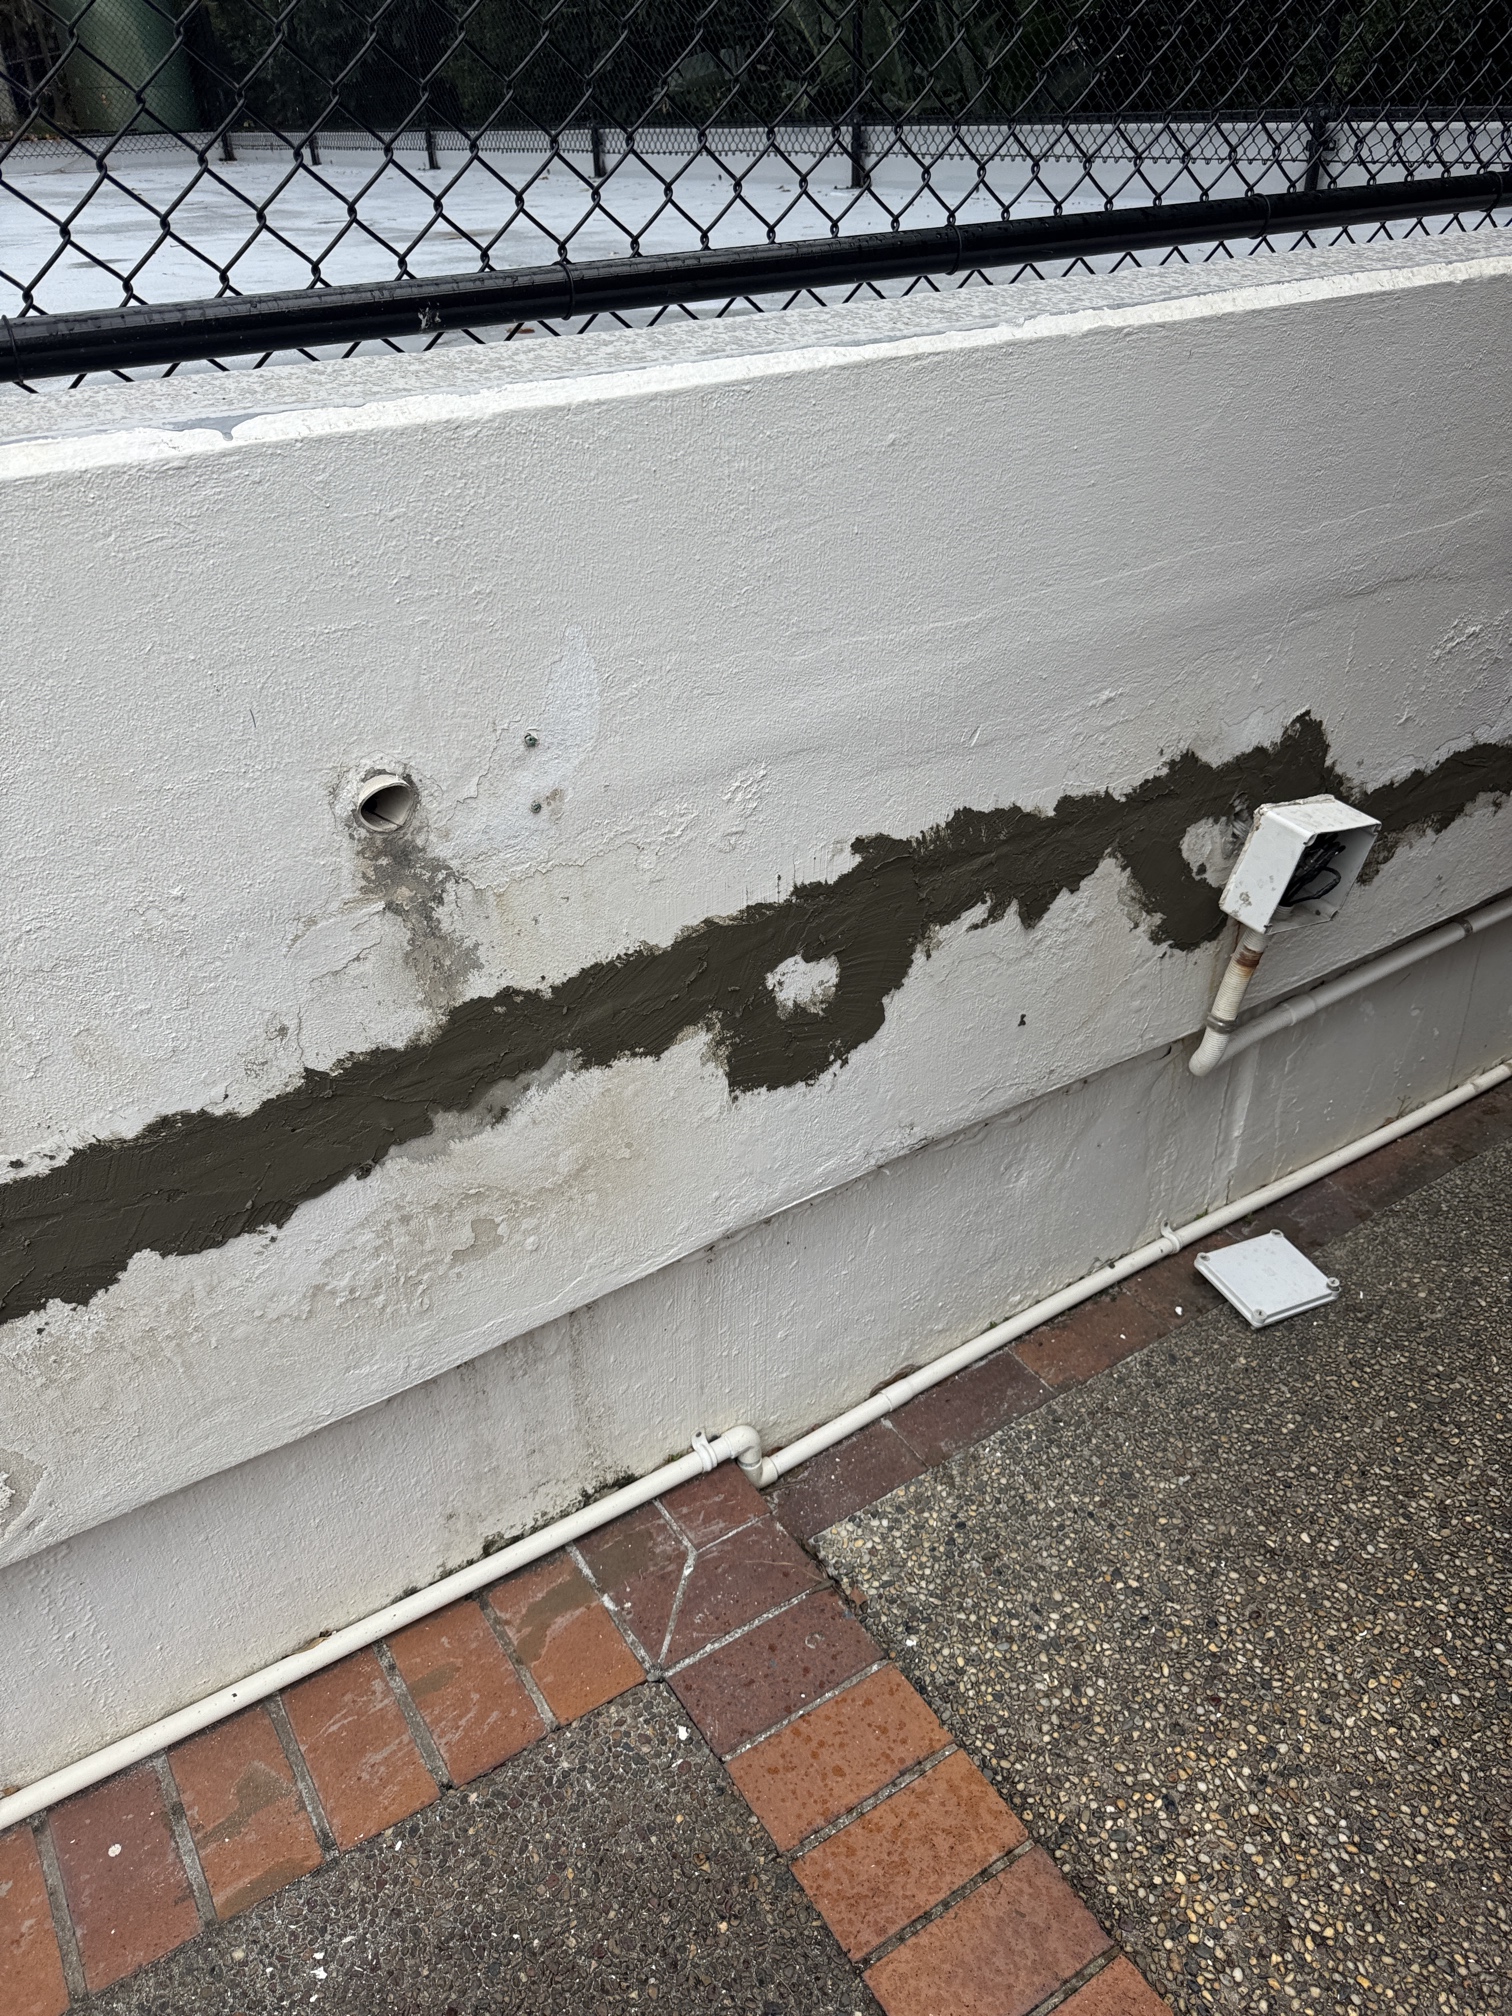
Step 4: Concrete Reinstatement
Using Structural Repair Mortar, we re-formed the damaged sections to restore the original wall profile.
Step 5: Membrane Primer Application
Once the damaged concrete was removed, reinforcement treated, and repairs completed, we applied a primer to the wall surface. This step is essential to ensure proper adhesion of the polyurethane membrane, which forms the final waterproofing layer.
Final Step: Membrane Application
To complete the remediation, we applied two coats of UV-stable polyurethane membrane over the repaired section. This durable, flexible membrane provides a long-term waterproofing solution, protecting the wall from further moisture ingress and UV exposure.
Long-Term Protection Achieved
By addressing both the visible damage and underlying causes, this remediation ensured the structural integrity of the wall was restored and protected against future water ingress. From detailed inspection through to structural repair and high-performance waterproofing, each step was carefully executed to deliver a long-lasting result.
If you’re noticing cracks, spalling, or signs of water damage on your building, it’s worth getting it assessed before the problem worsens. Get in touch with our team to discuss a tailored solution for your property.